I'm connected. How do I change the orientation of the SoloScreen and update the display?Updated 9 hours ago
The SoloScreen can be used in both horizontal (landscape mode) and vertical orientations (portrait mode), providing flexibility to accommodate various workflows. Changing the screen to match your orientation is easy!
For Mac:
We've created an app to help you arrange your SoloScreen in relation to your laptop, change your orientation, and even zoom in and out more easily! If you're interested in beta testing (currently for Mac only), visit our SnapDisplay App page for details!
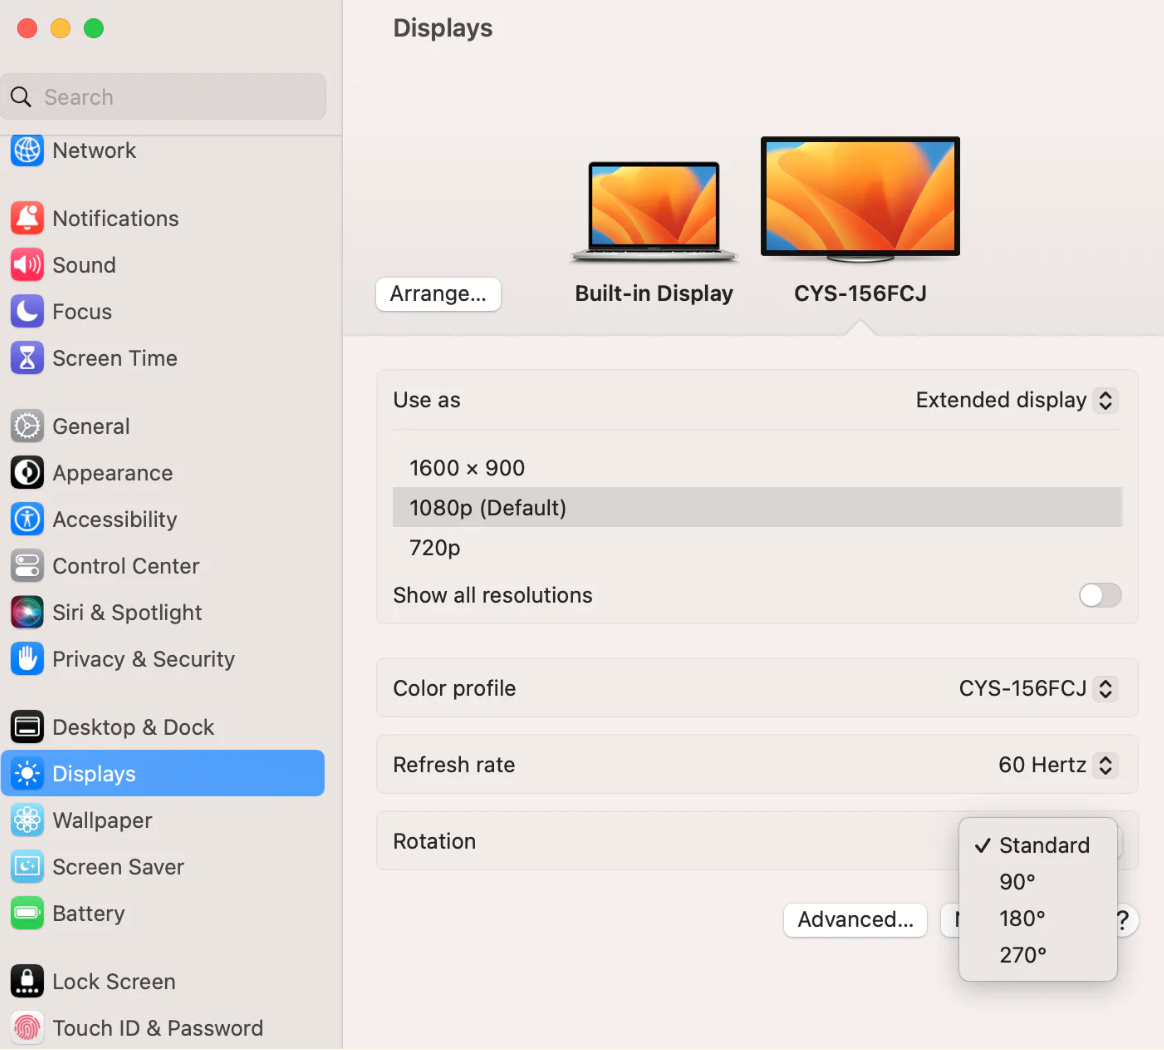
1. On your Mac, choose Apple menu > System Settings, then click Displays in the sidebar. (You may need to scroll down.)
2. Click the pop-up menu next to Rotation on the right and choose how many degrees to rotate the image on your display.
3. In the dialog that appears, click Confirm.
For PC:
1. Select the Start button, then type settings.
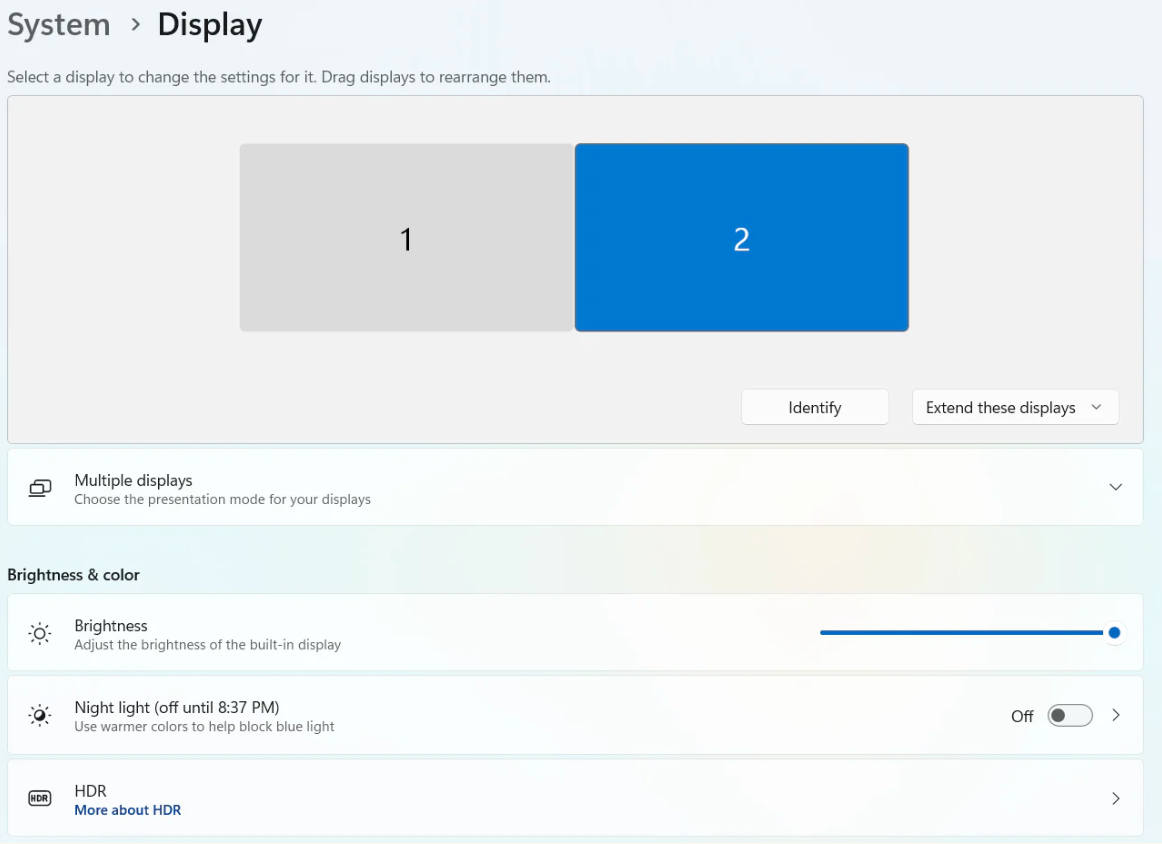
2. Select Settings > System > Display, and choose a screen orientation from the drop-down list next to Display orientation.
3. Select the "2" screen.

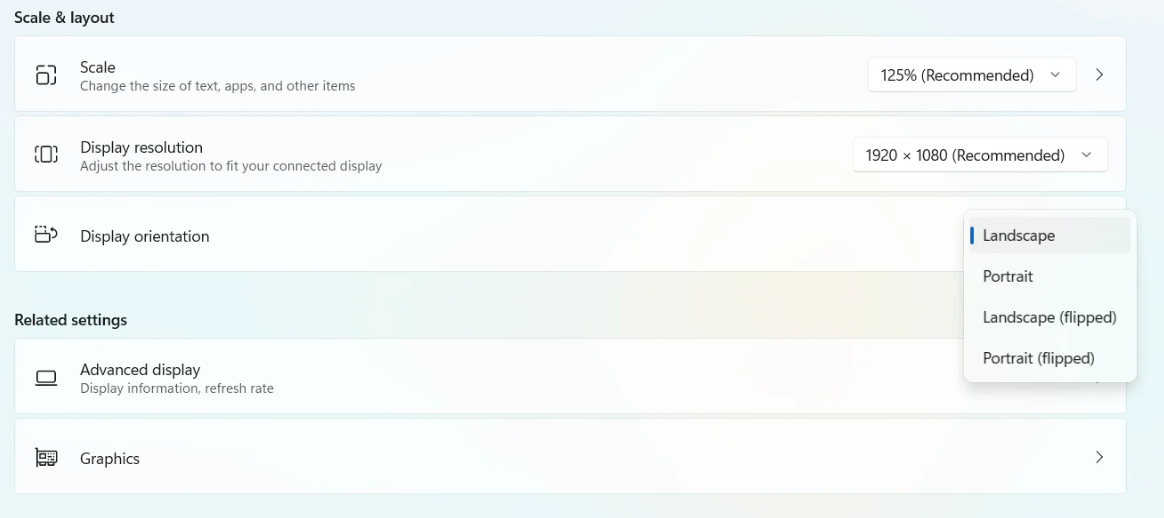
4. Scroll down until you see the header, "Scale & layout".
5. Under "Display Orientation" select your desired orientation.

If you have remaining questions, please reach out to us HERE! We're here to help get you up and running ASAP.